
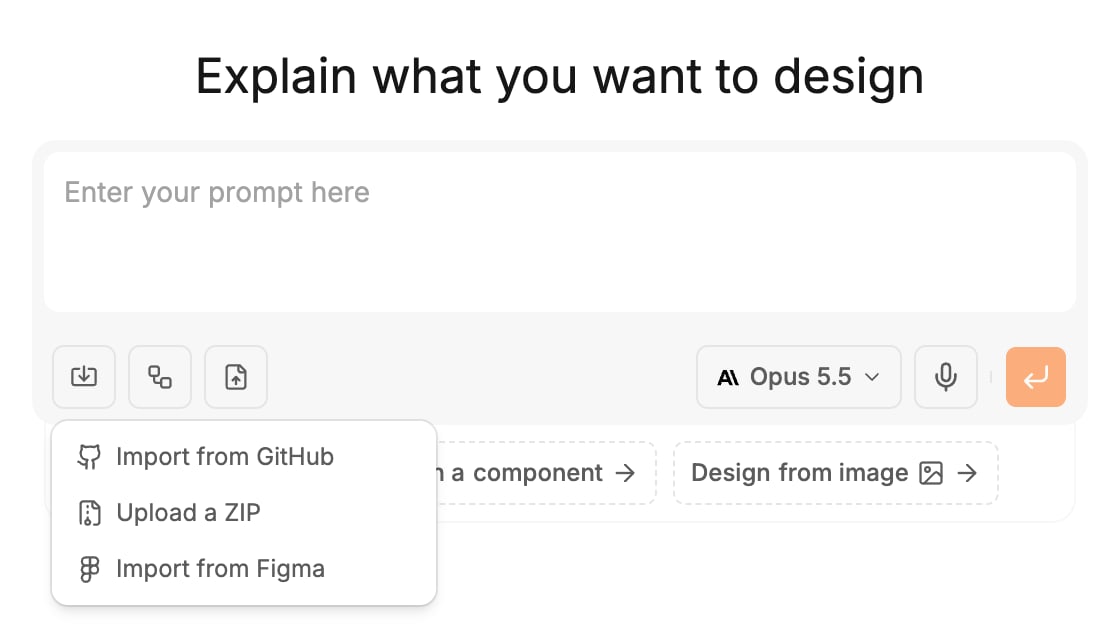
What can be imported
Polymet shows the supported stack before every import.
Importing a project that is not supported may fail or render incorrectly.
Import from GitHub
- On the projects page, click the import icon in the generation input.
- Choose Import from GitHub, then Continue.
- If GitHub is not connected yet, click Connect to GitHub and approve access. If the dialog still shows “Connect GitHub first” afterwards, click Refresh.
- Pick a Repository and a Branch.
- Pick the Organization the project belongs to, and a Project name if you want a different one.
- Click Import.
Choose the branch carefully
Polymet pushes every change straight to the branch you import. If you want to review its changes in a pull request, work on a separate branch:- Open the Branch list and choose new branch at the top.
- Pick a Base branch, such as
main. - Name it, for example
polymet/pricing-redesign.
Upload a ZIP
- On the projects page, click the import icon in the generation input.
- Choose Upload a ZIP, then Continue.
- Drop the zipped project folder on the upload area, or click it to choose the file. The limit is 300 MB.
- Pick the Organization and a Project name.
- Click Import.
After the import
The project opens on the canvas like any other. Ask the agent for a change, or open the code editor to look around first. For a GitHub import, changes you push to the branch come into Polymet, and Polymet’s changes go to GitHub. See Sync a project with a repository.Related
- Connect GitHub — what Polymet can and cannot touch in your account
- Sync a project with a repository — how two-way sync works
- Edit code — browse and change the imported files
- Import from Figma — start from designs instead of code