
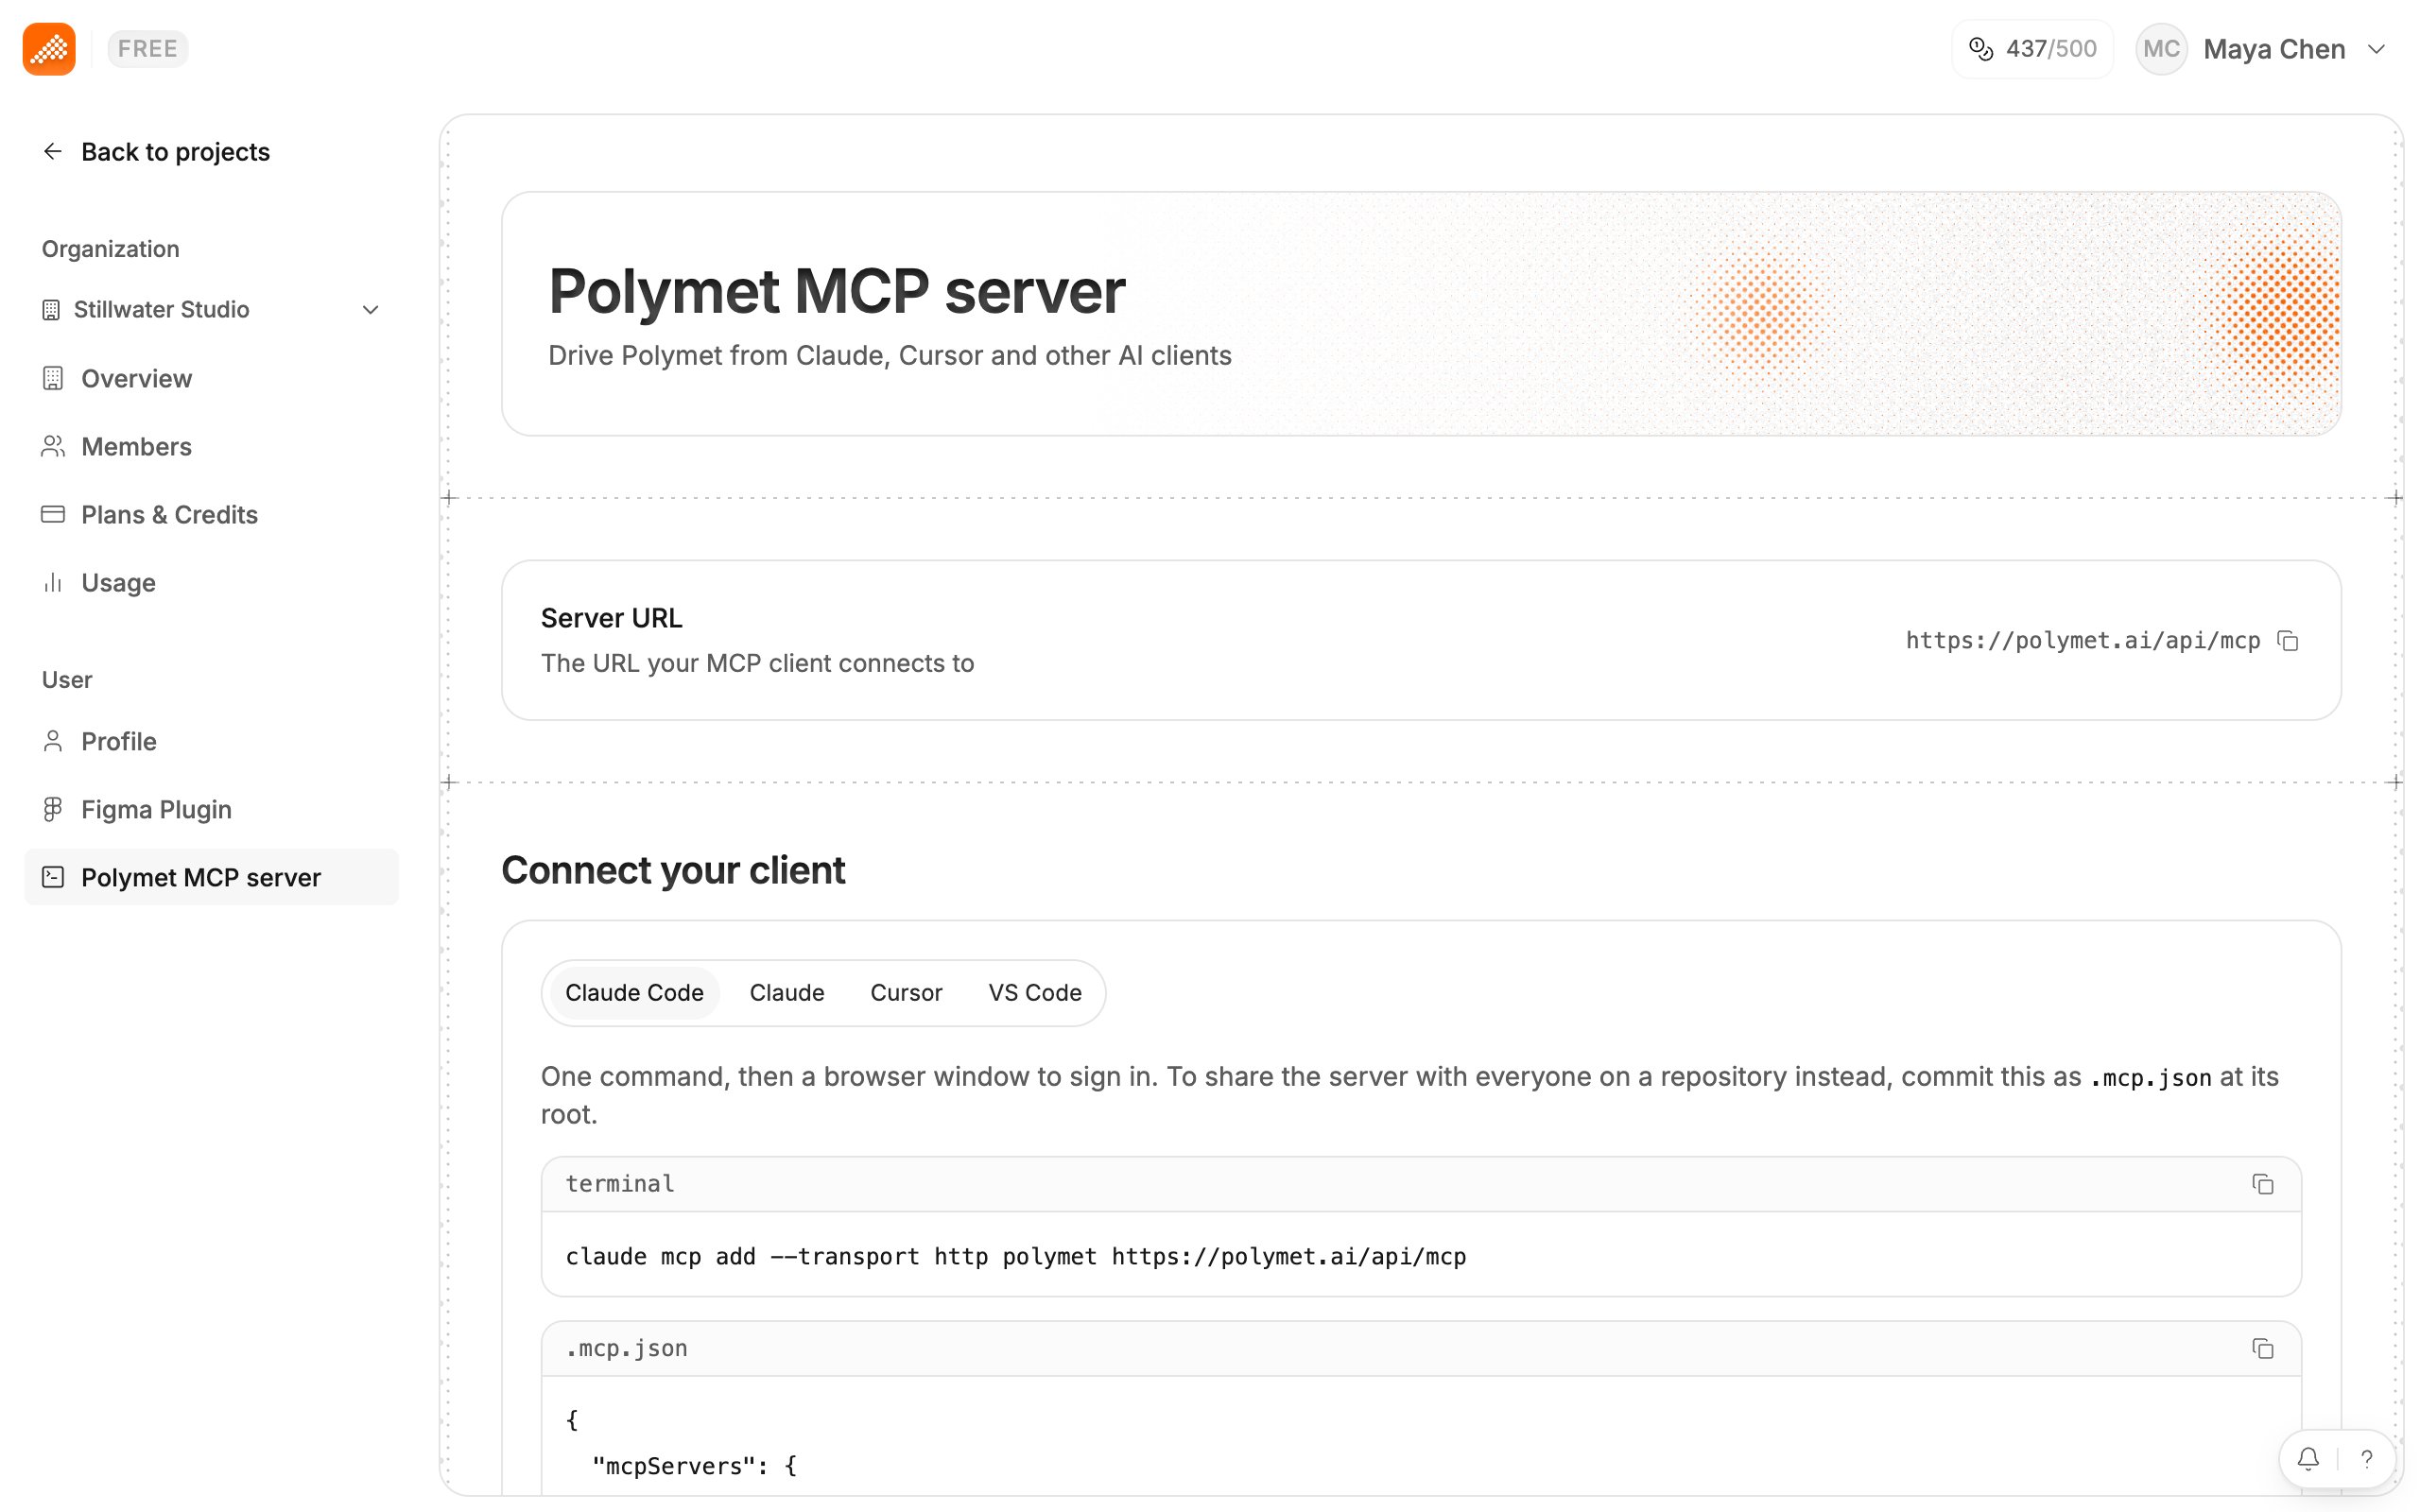
Find your set-up steps
- Open the profile menu and click Settings.
- Click Polymet MCP server.
- Under Connect your client, pick Claude Code, Claude, Cursor or VS Code. Each tab has a copy button for its command and config.
Claude Code
Run this in your terminal, then sign in to Polymet in the browser window that opens:.mcp.json at the repository’s root:
Claude
- In Claude Desktop or on claude.ai, open Settings, then Connectors. The Open Connectors button on the settings page takes you there.
- Add Polymet as a custom connector, using the server URL above.
claude_desktop_config.json and restart Claude.
Cursor
- Click Add to Cursor. Cursor opens with Polymet filled in.
- Approve it and sign in.
~/.cursor/mcp.json for every project, or .cursor/mcp.json for one project, then reload Cursor. If the file already has an mcpServers object, add "polymet" inside it instead of starting a second one.
VS Code
Run this to add Polymet to your user profile, then sign in to Polymet in your browser:MCP: Add Server in the Command Palette does the same. To set it up by hand, paste this into .vscode/mcp.json or your user-level server config:
What to ask for
Ask your coding agent for something you want to see, and say to use Polymet:Related
- What your agent can do — every tool the Polymet MCP server offers
- Integrations, connectors and the MCP server — how this differs from agent connectors
- How credits work — what a prompt costs