
Start a branch
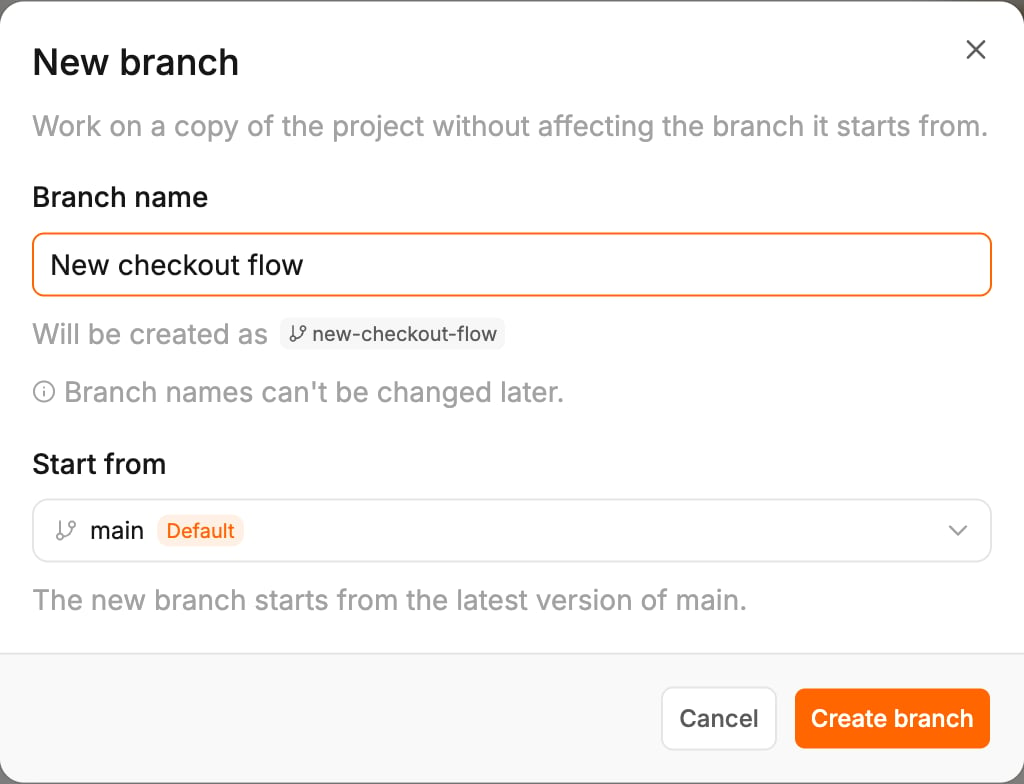
- On the canvas, click New branch next to the project name. Once a project has more than one branch, the button becomes the branch menu: click the branch name, then New branch at the bottom.
- Type a Branch name, such as “New checkout flow”. Letters a–z, numbers and dashes work; spaces become dashes. The dialog shows the name as it will be saved, under Will be created as.
- Under Start from, pick the branch to copy. The new branch starts from its latest version.
- Click Create branch.
Switch branches
Click the branch name next to the project name to open the branch menu. It lists every branch with when it last changed and who has it open. The default branch, marked Default, comes first. Click a branch to switch to it.- The address in your browser names the branch, so a link you share opens the same branch.
- Each branch runs one generation at a time. Work on one branch never waits for another.
- Threads belong to the whole project. Each message shows the branch it was sent on, and opening a thread switches you to the branch it was last used on.
- If you have unsaved edits, Polymet asks what to do with them before you switch.
Merge a branch
When you are on a branch other than the default one, its row in the branch menu has two buttons that merge with the default branch. The same two are in every branch’s ⋯ menu, where you can pick any other branch.- Update from… brings changes from another branch into this one. Use it to catch up with main.
- Merge into… sends this branch’s changes into another branch. Use it when the work is done.
When a merge conflicts
If both branches changed the same files, the dialog says “Both branches changed these files, so they can’t be merged automatically. Nothing was changed.” and lists the files. Click Solve with AI. Polymet opens one of the two branches and writes a prompt in the generation input asking the agent to bring the other one in and fix those files. Nothing is sent until you send it, and the agent asks in the thread before it merges. With Merge into…, the box “Merge dark-mode into main when solved” (with your branch names) is ticked by default, so the agent finishes the merge on the branch you are merging into. Untick it to fix the conflicts on your own branch instead and leave the other branch untouched.Delete a branch
Open the branch’s ⋯ menu and click Delete. The dialog, such as “Delete dark-mode?”, counts the versions only that branch has and warns that its preview links will stop working. Click Delete branch. This cannot be undone. The threads stay. The default branch cannot be deleted. On a project linked to GitHub, you can also delete the branch there.What only the default branch does
Only the default branch reaches the people using your live app. These run on the default branch only:- Publishing a prototype. On another branch, Publish shows “Only main can be published”, with Switch to main.
- Releasing a design system. On another branch, the dialog says “Only main can be released”.
- The project’s picture on the projects page.
- Changes to your backend: database changes, the agent writing data, updating backend functions, and setting secrets. The agent can still read your data from any branch.
Related
- Compare options side by side — put the same page from two branches next to each other
- Versions and rollback — go back to an earlier version
- Sync a project with a repository — branches mirror to GitHub under the same name
- Work at the same time — see who is on which branch